Encrypted Email Set-up for macOS
Please consider the date when this article was last updated by looking at the bottom right corner of the page when evaluating the accuracy and security of the following guide.
For encrypting emails on Windows, click here. For encrypting emails on Linux, click here. Access Now Helpline is at your service if you have any questions.
Note on Usage
This guide is recommended for a specific use case, in which the user only uses Thunderbird as a tool for email encryption, while reading and sending unencrypted email through their webmail interface in a browser or through a different client.
You can still use Thunderbird as your regular mail client, and we recommend it if you prefer to download your email to a secure device instead of leaving it in the servers of your email provider. For this latter case, we will recommend alternative settings in the relevant sections.
What You Will Get from This Guide
- The ability to send and receive encrypted emails
- The ability to digitally sign your emails
- The ability to make sure that you are encrypting your email only for the intended recipient/s
Before Beginning
In order to better protect the data in your computer, we highly recommend making sure that your device is encrypted. To do so, check that FileVault2 is enabled before starting this guide.
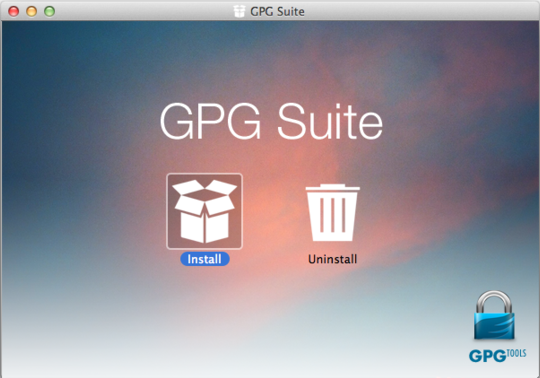
Download and Install GPG Suite
In order to encrypt your emails, you will first need to download and install GPG Suite, the encryption manager that enables your computer to encrypt your emails.
-
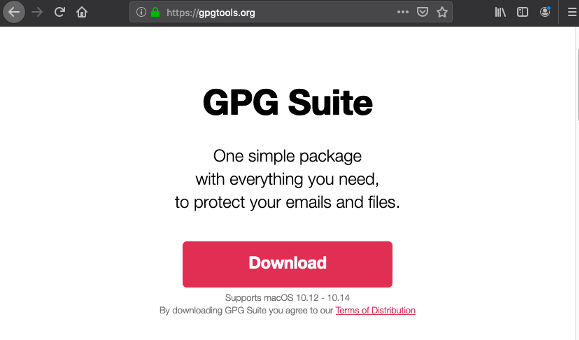
Download GPG Suite by clicking the “Download” button in GPG Suite website.
-
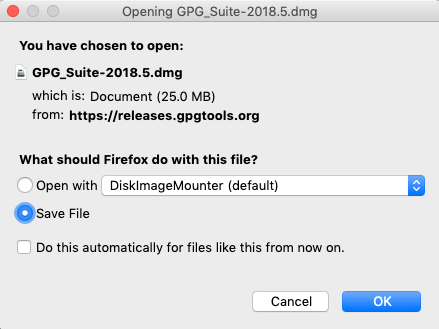
Check “Save File” and click “OK” in the prompt that pops up.
- Once you have downloaded the file (which will be called
GPG_Suite-YEAR.MONTH.dmg), verify it by following the below steps:-
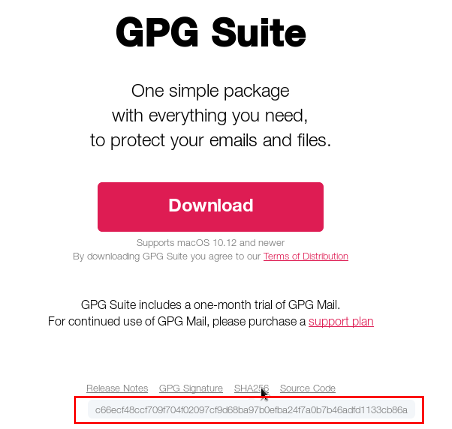
Hover over ‘SHA256’ on the download page below the download button, to visualize a sequence of numbers and characters.
-
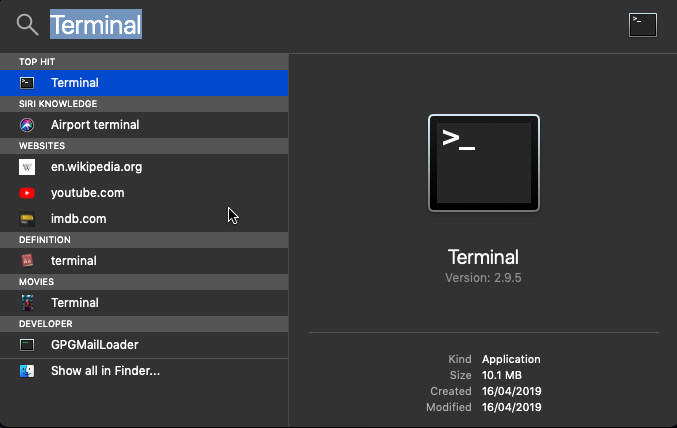
On your machine, open a terminal
-
Enter the command below in the terminal:
$ shasum -a 256 /path/to/GPG_Suite-YEAR.MONTH.dmgThe output should be the same as the sequence of numbers and characters you visualized when hovering over ‘SHA256’ on the GPG Suite download page. If the sequence is not the same, something wrong happened with your download. For example, the file could be damaged, or the download might be incomplete. Please do not move to the next steps before having completed the verification correctly.
-
-
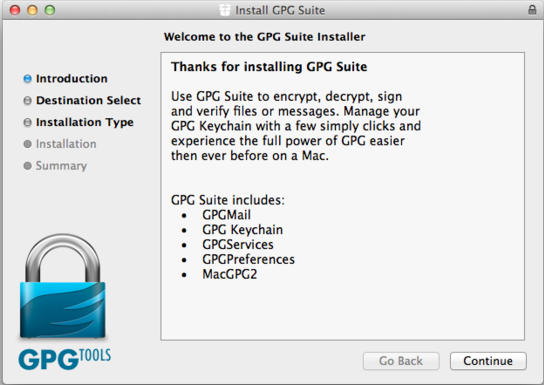
Once you have correctly verified the file, you can proceed with the installation: click the .dmg file you downloaded and then click Install.
-
In the installation wizard, click “Continue”
-
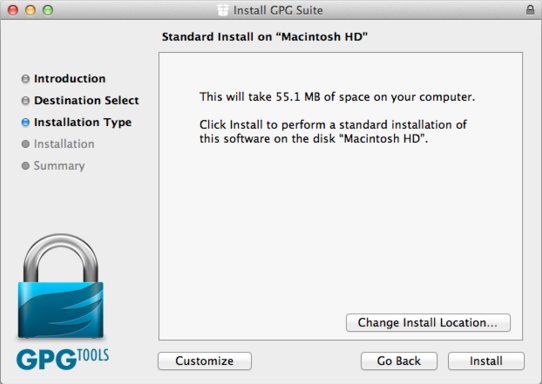
Finally, click “Install”
Download and Install Thunderbird
Thunderbird is an email client that can be used to download and send email, and that you can use together with an add-on called Enigmail to encrypt your email.
Recently thunderbird released the version 78 which is not stable enough for us, so we recommend to use thunderbird version 68, see link below
-
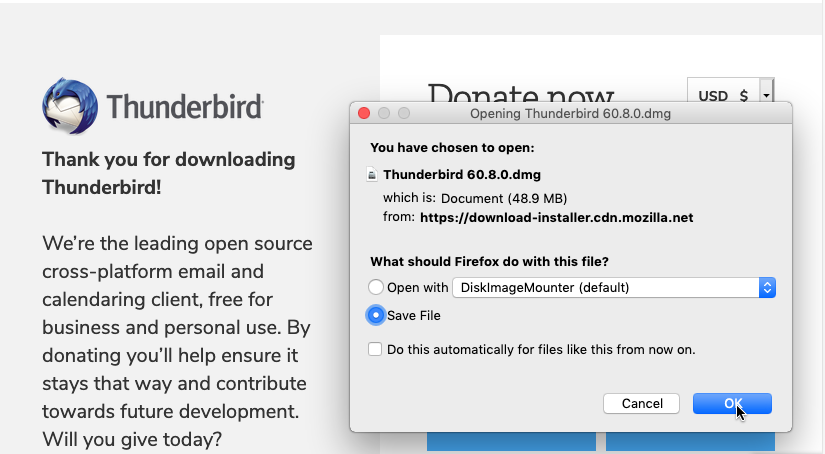
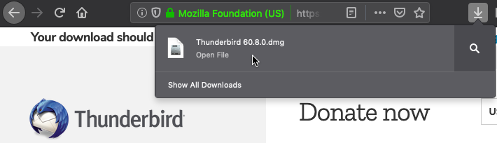
Click here and Download Thunderbird 68 (stable version) for OSX
-
When prompted, check “Save File” and click “OK”.
-
Click the download arrow in the top right of your browser, then click the Thunderbird .dmg file in your recent downloads.
-
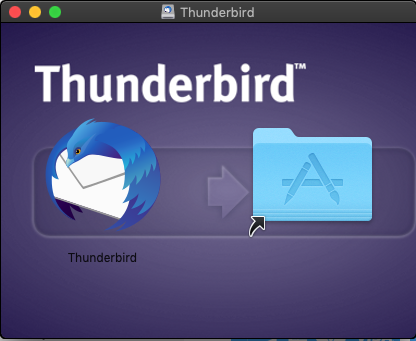
When prompted, drag the Thunderbird icon into your Applications folder.
Make sure to launch Thunderbird before continuing to the “Download and Install Enigmail” Section.
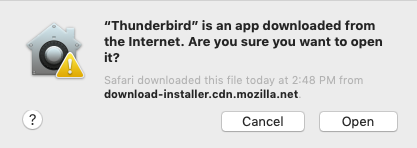
When you launch Thunderbird for the first time, you will see a warning popping up to ask you if you want to open an app downloaded from the Internet. Click “Open”.
Note: When Thunderbird is launched for the first time, it will also ask if you would like to set up an existing email account. We will explain how to set up your email account in Thunderbird in the “Link Thunderbird to Your Existing Email Account” section below. You can click “Cancel” to continue following this guide, or, if you know what you’re doing, set up your existing email account now.
Download and Install Enigmail
Enigmail is an add-on for Thunderbird to encrypt, decrypt and sign emails, and to manage PGP keys.
-
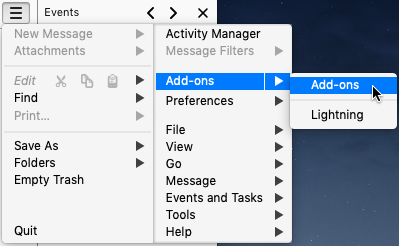
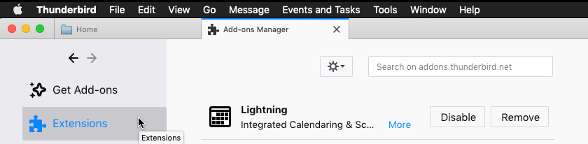
Open Thunderbird and click the three-bar menu button in the top right corner.

-
Click “Add-ons” -> “Add-ons”.
-
Click on the “Extensions” tab in the left-hand panel.
-
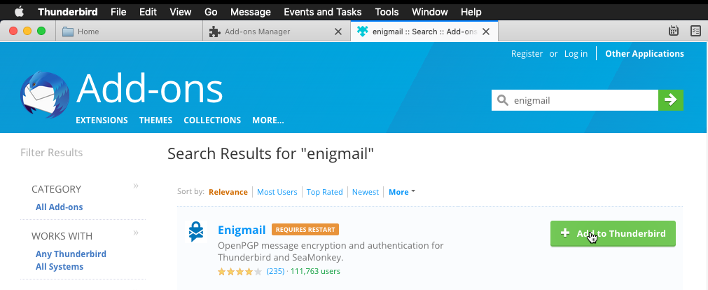
Type “Enigmail” in the search field in the top-right corner and hit Enter.

-
The first result should read “Enigmail”. Click “Add to Thunderbird”.
-
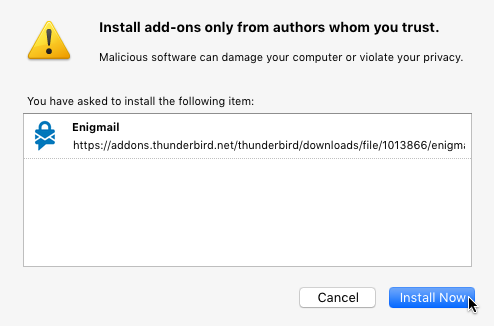
A pop-up will ask you to confirm that you want to install Enigmail. Click “Install Now”.
Link Thunderbird to Your Existing Email Account
-
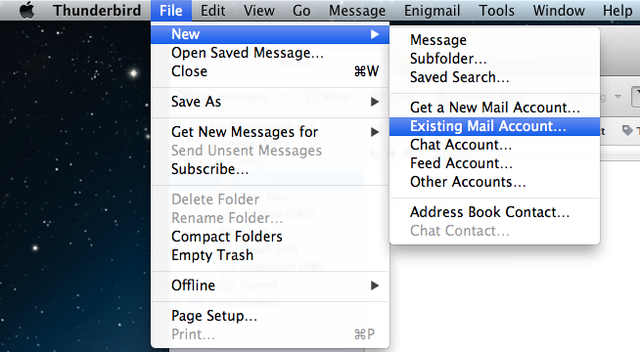
Add your existing email account to Thunderbird by navigating to Thunderbird’s menu bar. Click “File”, then click “New”, then “Existing Mail Account”.
-
Fill out your complete name, your email address and your password. Then uncheck “Remember password”.
It’s important to fill out your first and last name if you want the receiver to recognize you. But this is not mandatory: you can enter anything you would like to be addressed with.
Please note that if you have enabled 2-factor authentication on your email account, you might have to enter an app-specific password here. This won’t be necessary if you are using a Gmail account.
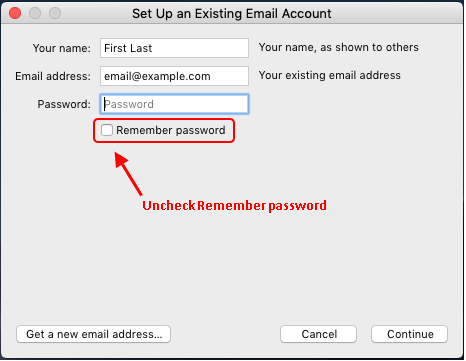
Note: if you prefer Thunderbird to store your password, you should make sure that the password database is encrypted, so that nobody who has access to your computer can get to your email password. To do this, you will need to set a strong master password, following these instructions.
-
Click “Continue”. Thunderbird will check that your email configuration is correct and will present you with two options for reading your incoming email: IMAP or POP3.
Leave “IMAP (remote folders)” selected if you want to access the same messages from multiple devices, leaving your email in the servers.
If you prefer to use Thunderbird for all your email, and to download your email to a trusted secure device rather than keep it in servers you don’t control, select the “POP3 (keep mail on your computer)” option. Please note that by choosing this option, the messages you have downloaded will no longer be accessible from other devices. For more details on the IMAP and POP3 options, check out this Wikipedia page.
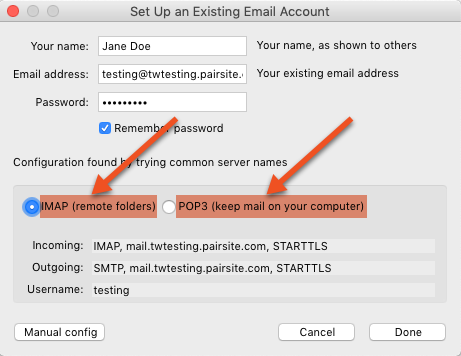
Important: Make sure that both the Incoming and Outgoing information shown on the screen above display SSL (Secure Sockets Layer) or STARTTLS (Start Transport Layer Security). Either one indicates that your connection to your email provider will have a basic layer of encryption.
If everything has worked fine, by clicking the “Done” button Thunderbird will connect to your email server and download your mailbox. This operation will happen in the background and might take some time, depending on the size of your inbox folder and speed of your internet connection.
If you are using a Gmail account, you will be prompted to enter your password and 2-factor authentication code and to accept the connection to an email client.
Create a Private and Public Key: Your PGP Key Pair
Once your email account is connected to Thunderbird, you can start using PGP by creating a key pair, consisting in a private key, which you must store safely and never share with anyone, and a public key, which you can share publicly or with trusted people.
-
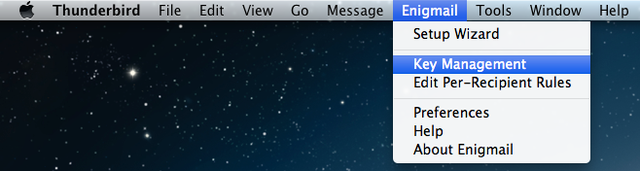
In the Thunderbird menu bar, click “Enigmail”, then select “Key Management”.
-
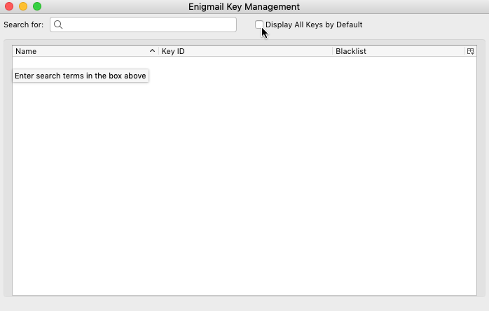
Enigmail’s key manager window will appear.
-
Click “Generate” in the menu bar and choose “New Key Pair” in the drop-down menu.

-
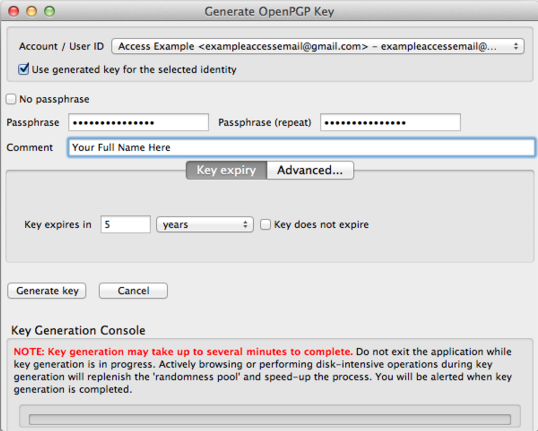
Choose a strong and unique passphrase for your key (if you don’t know how to generate a strong password, please read this guide). In a nutshell, your passphrase should be at least 20-characters long and include special characters, capital letters and numbers.
In the “Key expires in” box, you can leave the default 5 years option, or select a shorter time span. Don’t choose a longer time span, and leave the “Key does not expire” option unchecked.
-
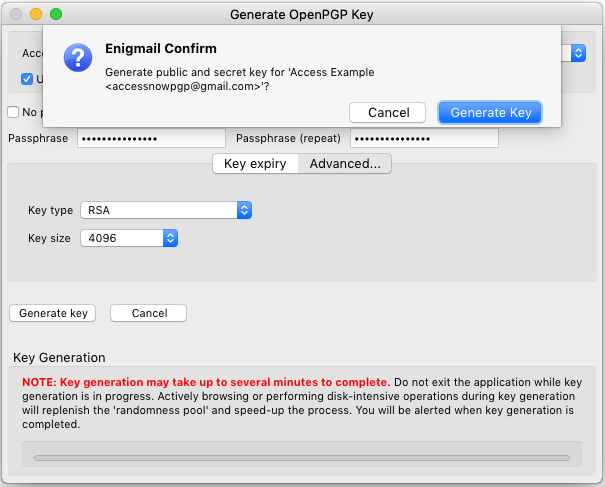
Click on the “Advanced” tab next to “Key Expiry”, and make sure the key size is 4096 and the key type is RSA.

-
Click “Generate Key” and confirm to generate your key pair.
Generate a Revocation Certificate
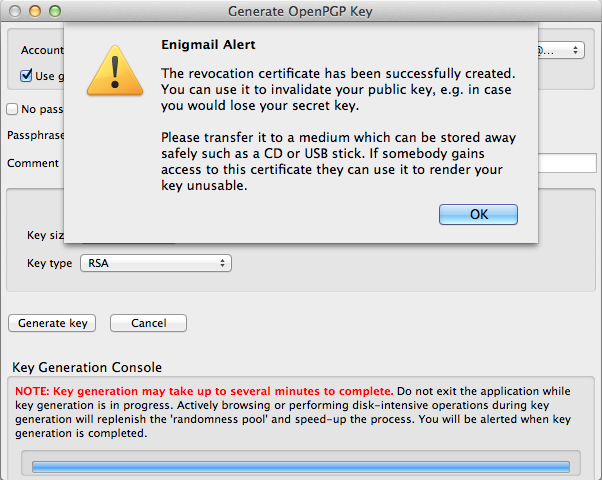
While Enigmail is generating your key pair, you will also be asked to generate a revocation certificate. Generating a revocation certificate is important and you should click on the “Generate Certificate” button in the prompt, and save the certificate in a secure location (like an encrypted USB stick that you keep for exclusive, personal use).
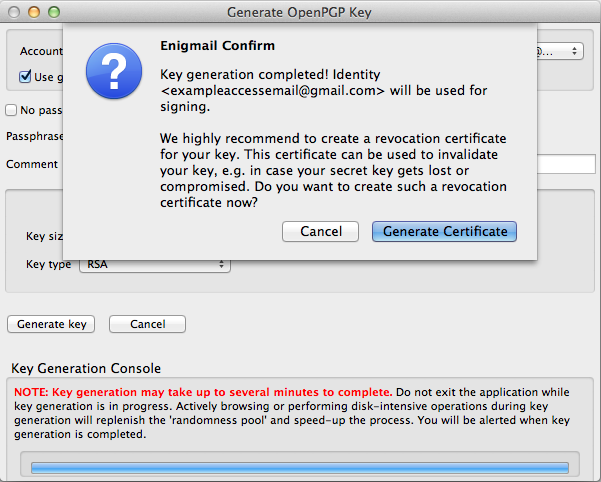
This file is needed only to revoke your key pair in case you lose your private key or there are doubts about it being compromised. The revocation certificate cannot be used to decrypt your PGP-encrypted communications.
The revocation certificate will allow you to securely discontinue the usage of your key at any time. It is very important to create a revocation certificate for future use and store it in a secure place that only you or trusted people can access and that is separate from the device where you keep your key pair. Revoking your key will prevent people from encrypting to the unused or compromised key, and signals to the keyservers that the key is no longer valid.
Generate a Revocation Certificate for an Existing Key Pair
If you did not create a revocation certificate while generating your key pair, you should do so now, following the steps below:
-
Go to the Thunderbird menu bar, click “Enigmail”, then choose “Key Management”.
-
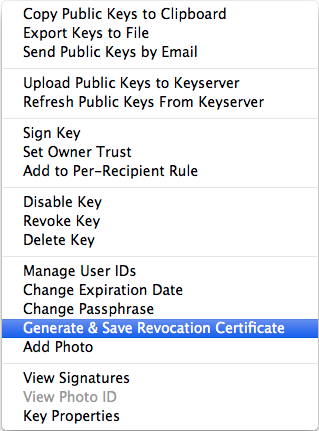
Find the key you would like to generate a revocation certificate for, and right-click it.
-
Select “Generate & Save Revocation Certificate” from the drop-down menu.
-
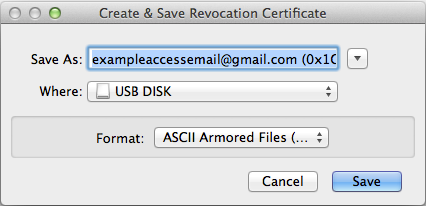
Choose a secure location to save your revocation certificate. An encrypted USB stick that you do not lend out and is kept for exclusive, personal use is a good choice. Make sure to keep the storage device where you have saved the certificate in a secure place.
-
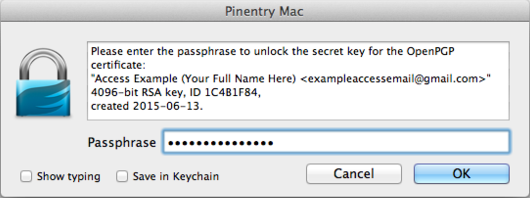
Type in the passphrase for your PGP key and click “OK”.
-
You will be notified that the revocation certificate has been successfully generated. Click “OK”.
Back up Your Key Pair Somewhere Safe
Backing up your key pair in a safe location is important to be sure you will not lose it even if your device is lost or your hard disk damaged, or if you want to encrypt your emails with the same key pair on another computer.
-
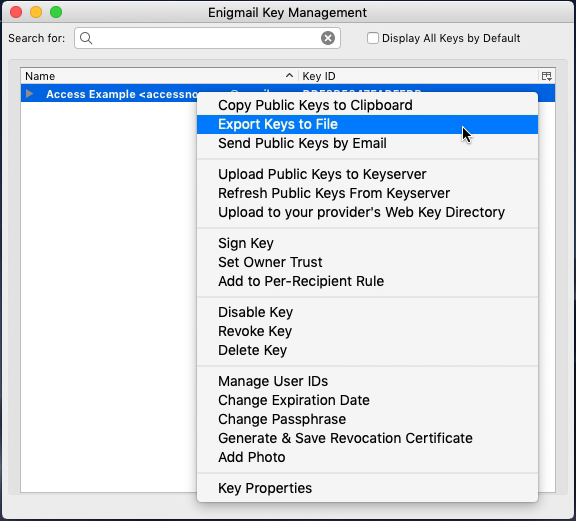
Open the Key Management window.
-
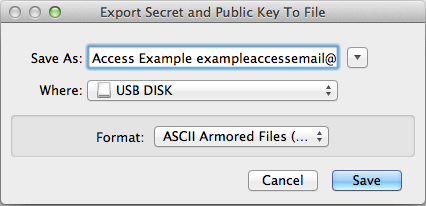
Right-click your key in the Key Management window and choose “Export Keys to File” in the drop-down menu.
-
Choose explicitly to “Export Secret Key”.

-
Choose where you would like the keys to be saved.
Note: The private key in your key pair is the most important component of the encryption system, and its security should be top priority. Only export your key pair to a secure place, like an encrypted USB stick that you use exclusively, store in a secure place, and do not lend out.
-
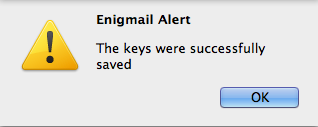
Upon clicking “Save”, you will be asked to type in the passphrase for your PGP key and click “OK”. You should see a message stating that “The keys were successfully saved”.
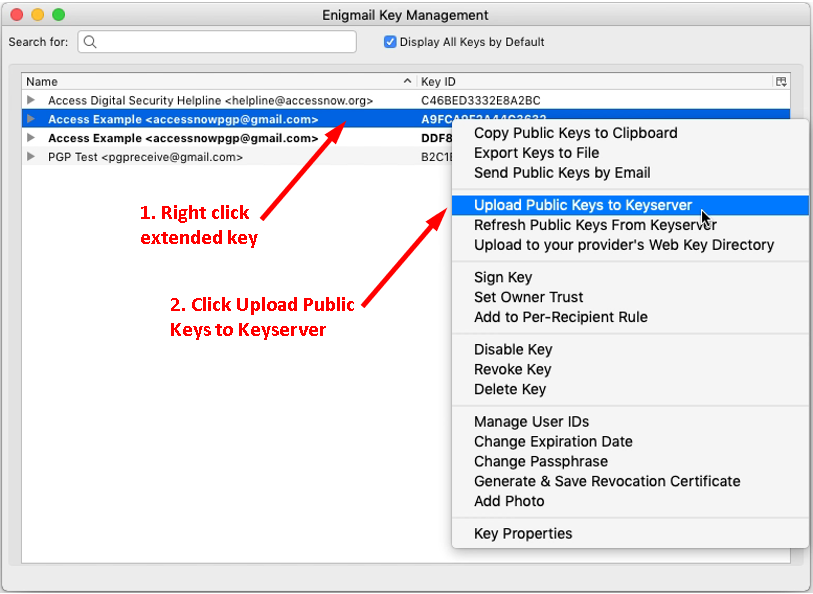
Publish Your Public Key
Your contacts will need to import your public key to encrypt messages to you. To let others find your public key, you may upload your public key to a key server or attach the key in an email. Public keys uploaded to key servers are searchable by the email address used or PGP Key ID.
Warning: If you don’t want to disclose publicly that you’re using encryption, for example because encryption is illegal in your country, you should avoid publishing your public key on the key servers. In such cases it’s a good idea to only send your public key by email or through other means to your trusted contacts you exchange encrypted emails with.
To upload your public key to a keyserver, follow these instructions:
-
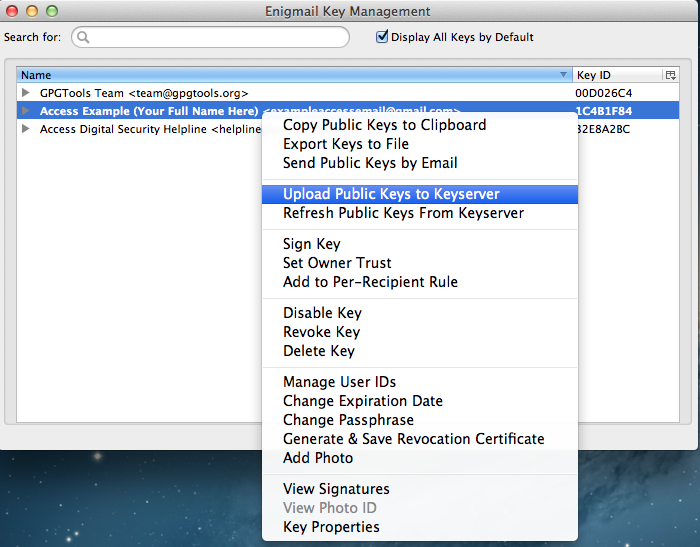
Go to Thunderbird’s menu bar. Click “Enigmail”, then “Key Management”.
-
Right-click on your key and choose “Upload Public Keys to Keyserver” in the drop-down menu.
Update Thunderbird Settings
Before you start encrypting your email, it is important to tweak some settings in Thunderbird, by following the steps below.
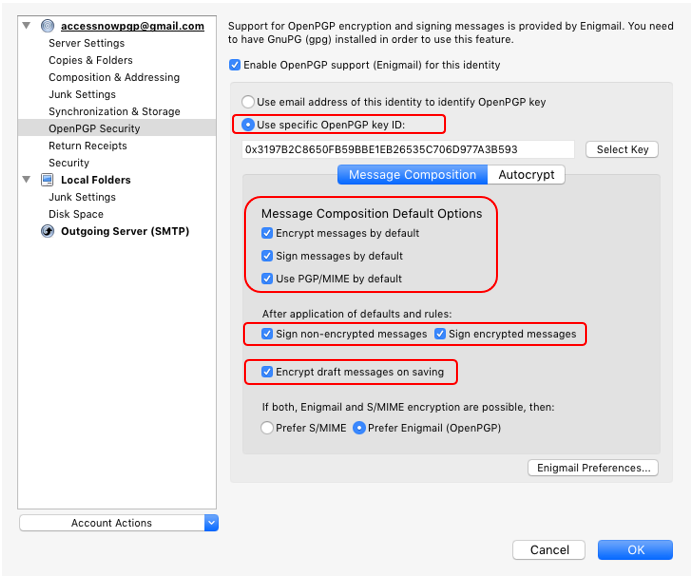
OpenPGP Security
-
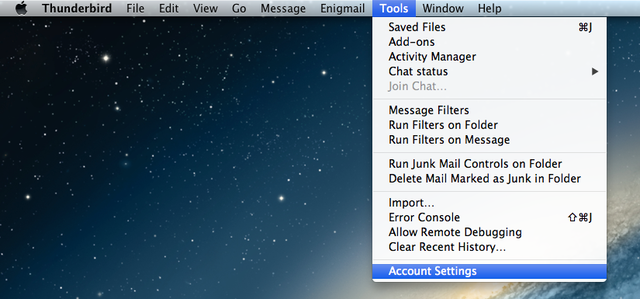
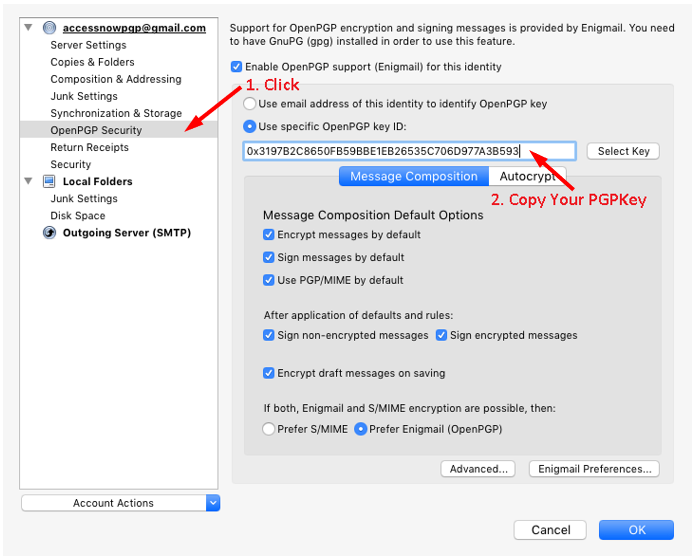
Navigate to Thunderbird’s menu bar, select “Tools”, then “Account Settings”.
-
Click “OpenPgp Security” in the left-hand menu. All “Message Composition Default Options” should be checked, to encrypt messages and drafts and sign messages by default. Make sure “Use specific OpenPGP key ID” is selected, with your public key ID below it. Also make sure that “Prefer Enigmail (OpenPGP)” is checked. Click “OK”.
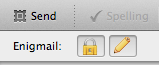
If you are not reading and sending unencrypted email from a webmail interface, and are using Thunderbird for managing all your email, you might want to uncheck the “Encrypt messages by default” option, to make it easier to write unencrypted messages. If you choose to uncheck this box, you should always make sure that the lock icon in your email form is highlighted as in the screenshot below when writing an encrypted email.
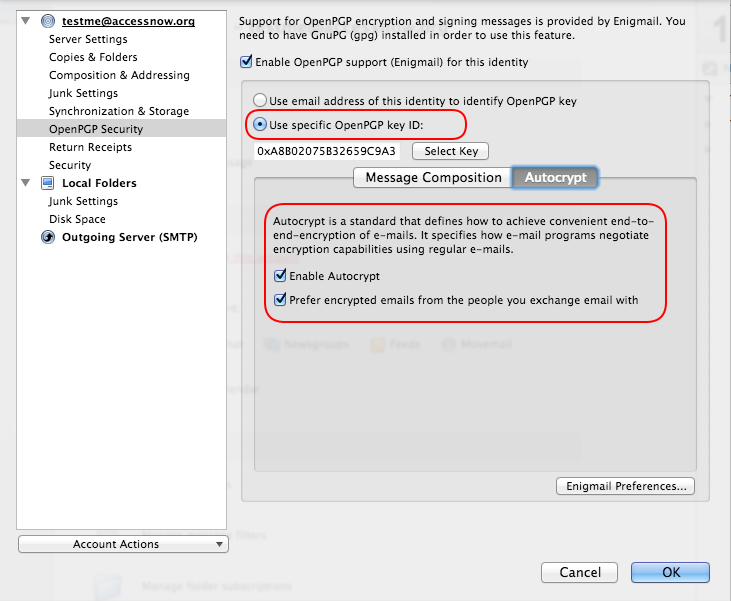
Autocrypt
Autocrypt is part of the default configuration of Enigmail.
Autocrypt aims at making encryption easier, but if it isn’t properly configured, it may disable encryption automatically for some email addresses.
To set up Autocrypt properly, it is important to change some settings by following these instructions:
-
Navigate to Thunderbird’s menu bar, select “Tools”, then “Account Settings”.
-
Click “OpenPgp Security” in the left-hand menu and select the “Autocrypt” tab (to the right of “Message Composition”). Check the following options:
- Enable Autocrypt
- Prefer encrypted emails from the people you exchange email with
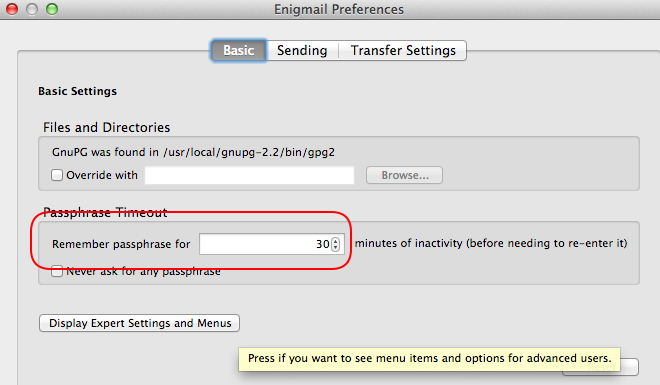
Enigmail Preferences
-
In Thunderbird’s menu bar, go to Enigmail → Preferences, and verify your passphrase is remembered for at least 30 and not more than 60 minutes of inactivity.
-
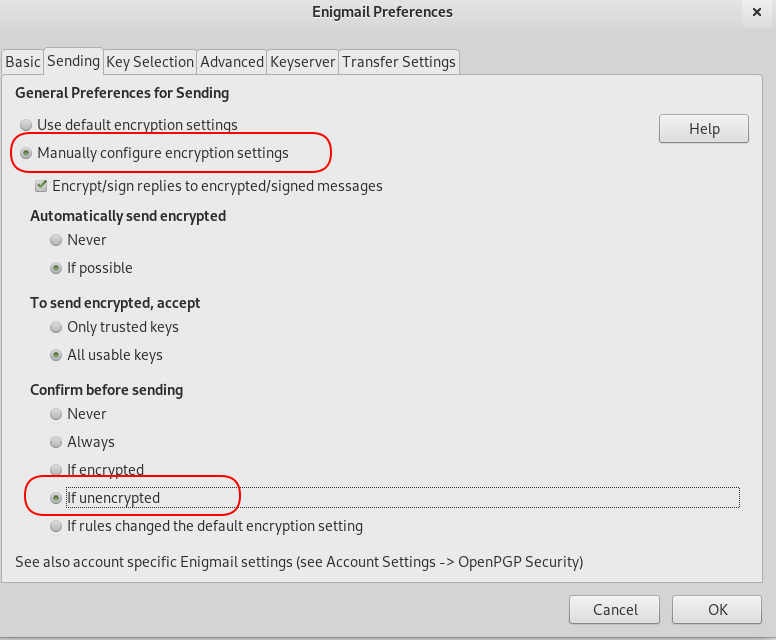
Click the “Display Expert Settings and Menus” button in the Preferences window, and select the “Sending” tab.
- in the “General Preferences for Sending” section, check the “Manually configure encryption settings” option.
- In the “Confirm before sending” section, check “If unencrypted”.
This step is optional if you are using Thunderbird to send unencrypted email, but please remember to make sure that the lock icon in your email form is highlighted as in the screenshot below when writing an encrypted email.
-
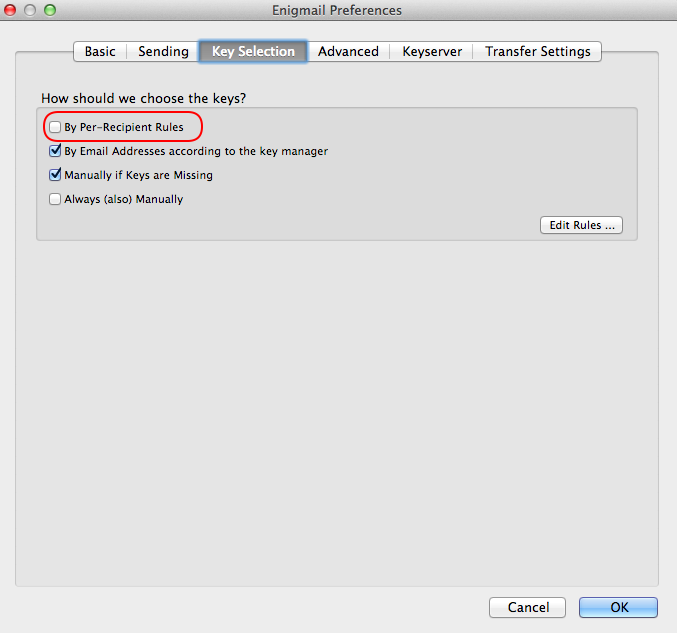
Go to the “Key Selection” tab and uncheck the “By Per-Recipient-Rules” option.
Subject Encryption
Enigmail can also encrypt the subject of your message (please note that other metadata will still be visible).
If the subject is encrypted, then the visible subject is replaced with a dummy text like “Encrypted Message”. It is a good practice to encrypt your subject by default, but please note that when writing to [email protected] you should disable this feature.
In order to disable subject encryption, go to Enigmail → Preferences → click “Display Expert Settings and Menus”, then go to the “Advanced” tab and uncheck the “Encrypt subject by default” option. Please, remember to do this every time you send encrypted emails to [email protected].

Disable HTML and remote content
Email messages can contain content such as scripts in the HTML code, images, or stylesheets that can violate your privacy or be used for malicious intents. To protect your privacy and to mitigate the risk of attacks or vulnerabilities, it is always a good idea to disable HTML composition and rendering, and to block remote content.
Disable HTML email composition
-
Navigate to Thunderbird’s menu bar, select “Tools”, then “Account Settings”.
-
Select the “Composition & Addressing” tab and uncheck the “Compose messages in HTML format” option.
Disable HTML email rendering
-
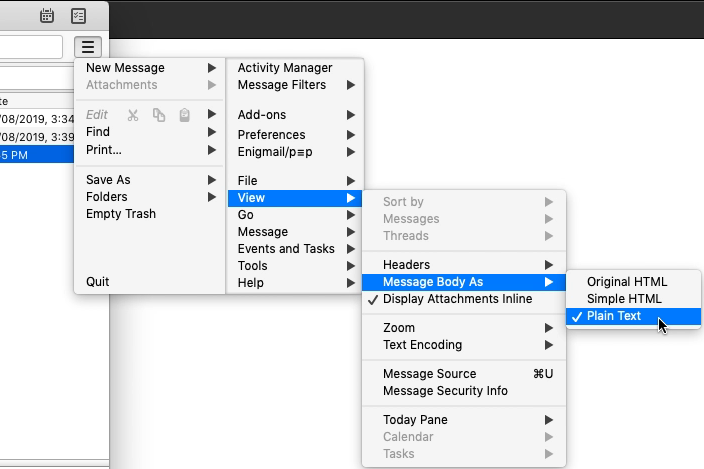
Click the three-bar menu button in the top-right corner of the main Thunderbird window and click View → Message Body As → Plain Text.
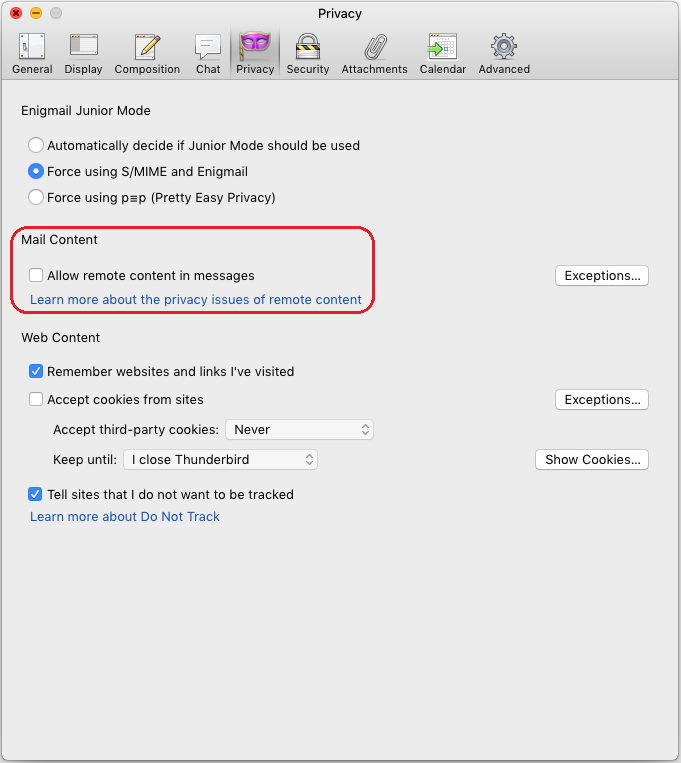
Disabling remote content in messages
Remote content should be disabled by default in Thunderbird, but it’s a good idea to check.
-
Click the three-bar menu button in the top-right corner of the main Thunderbird window and click Preferences → Preferences.
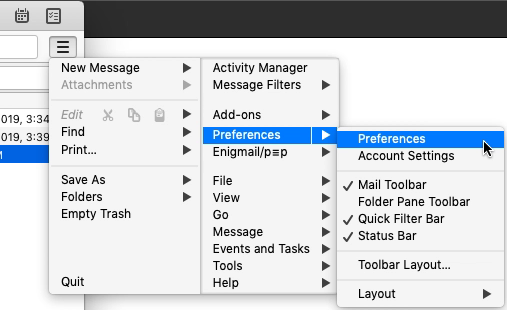
-
Select the “Privacy” tab and make sure that the “Allow remote content in messages” is unchecked.
Add Your PGP ID to Your Email Signature
-
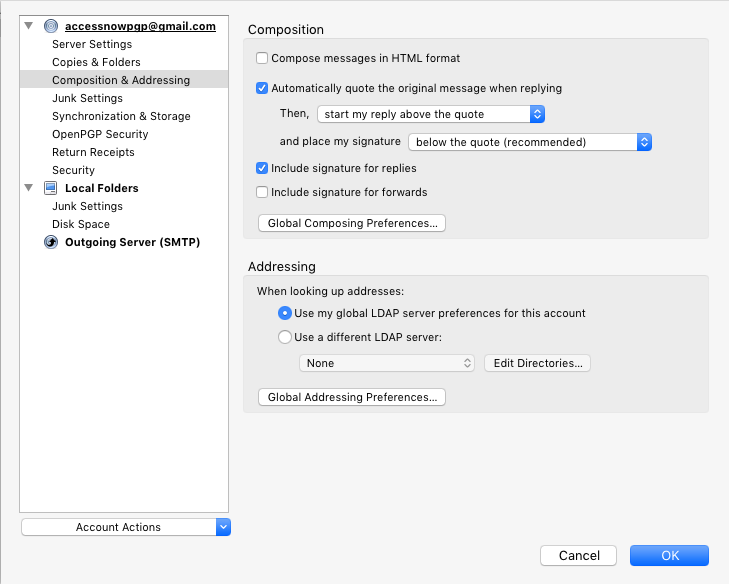
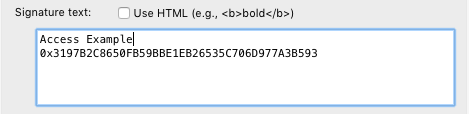
Navigate to Thunderbird’s menu bar, select “Tools”, then “Account Settings”.
-
Find your PGP key under “OpenPGP Security” and copy it.
-
In the left-hand menu, click on your email address, then type your public key into the box for the Signature text.
Send Your First Encrypted Email
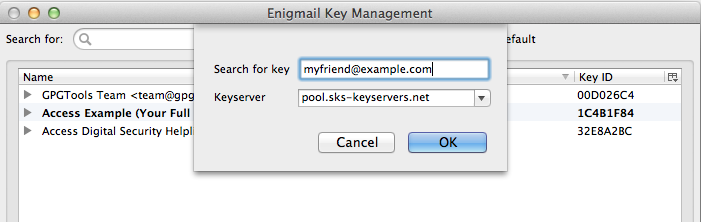
Download Your Receiver’s Public Key
-
Go to Thunderbird’s Menu Bar, select “Enigmail” and then “Key Management”.
-
In the menu bar, you will now be able to select “Key Server” and then “Search for Keys”.

-
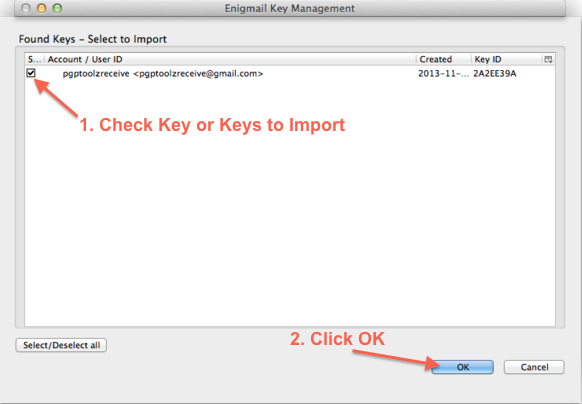
Search for a key by typing the email address of the receiver or the ID of their PGP key.
-
Select the key you need from the import window and click “OK”.
-
A message will inform you that the key has been imported. Click “OK”.
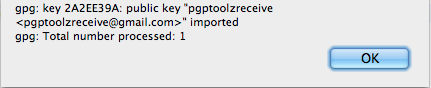 .
.Once the public key of the receiver is downloaded, you can send them an encrypted email.
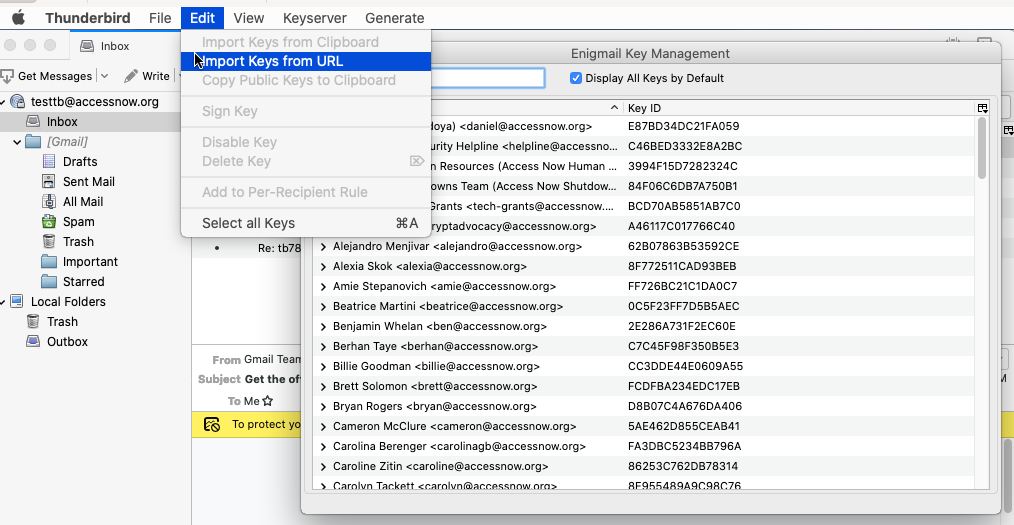
Import Public Key from URL
-
Go to Thunderbird’s Menu Bar, select “Enigmail” and then “Key Management”.
-
In the menu bar, you select “Edit” and then “Import from URL”.
-
Set the URL where the key is located:
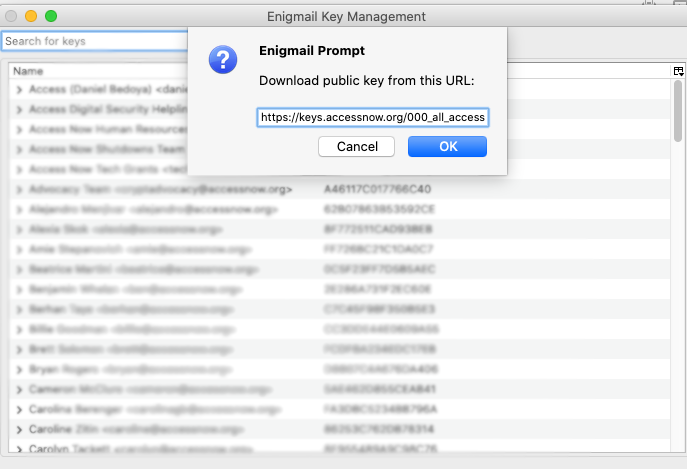
-
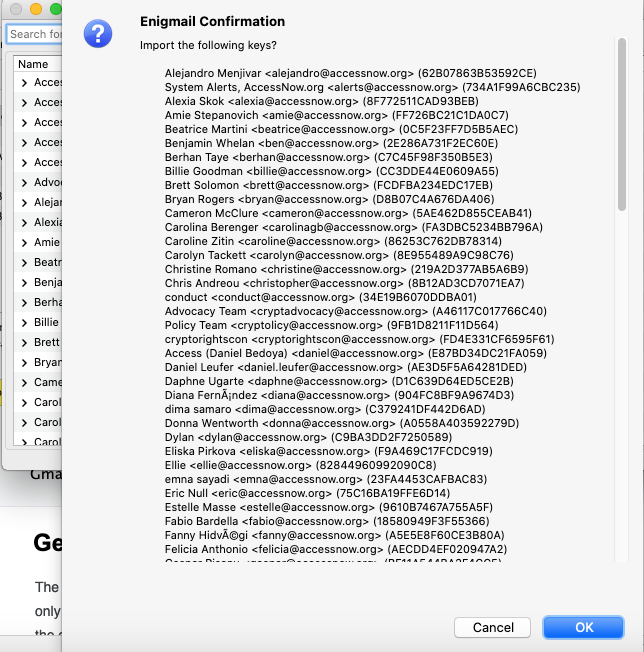
Confirm you want to import the keys
-
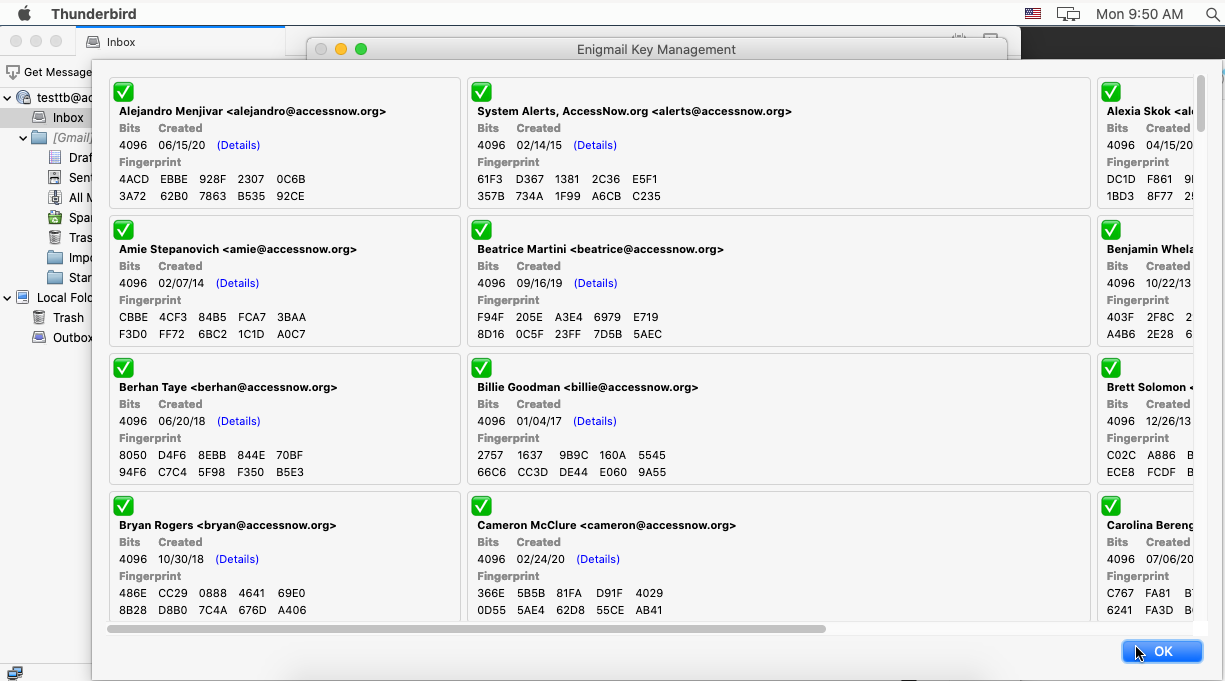
Press ‘OK’ to import the key
Verify the Fingerprint of the Downloaded Public Key
To be sure that the public key you’ve just downloaded is the right one, and that nobody has tampered with it, it’s a good practice to check its fingerprint.
-
To verify your receiver’s PGP key, you need to get its fingerprint directly from its owner. In some cases, you might have your contact’s business card with their PGP fingerprint included in it, or your contact may have published their PGP fingerprint in their official website. In other cases you will have to ask your receiver for the fingerprint. This communication should happen over a secure channel alternative to email or in person.
-
Go to Thunderbird’s menu bar. Click “Enigmail”, then “Key Management”.
-
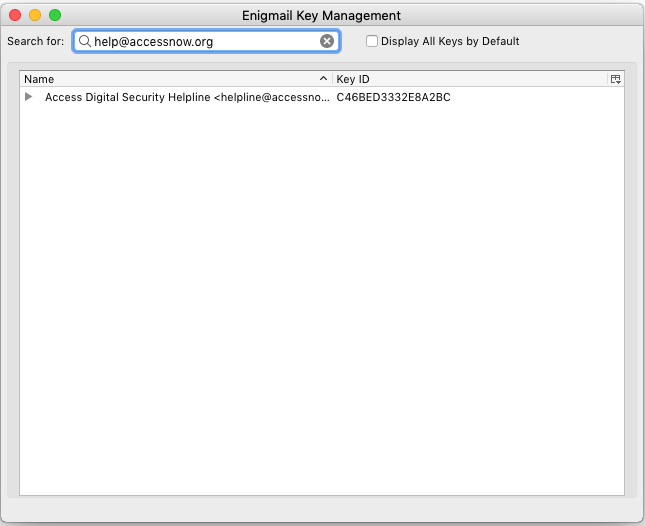
In the “Key Management” window, search for your receiver’s address to identify their key.
-
Right-click your receiver’s key and select “Key Properties”.
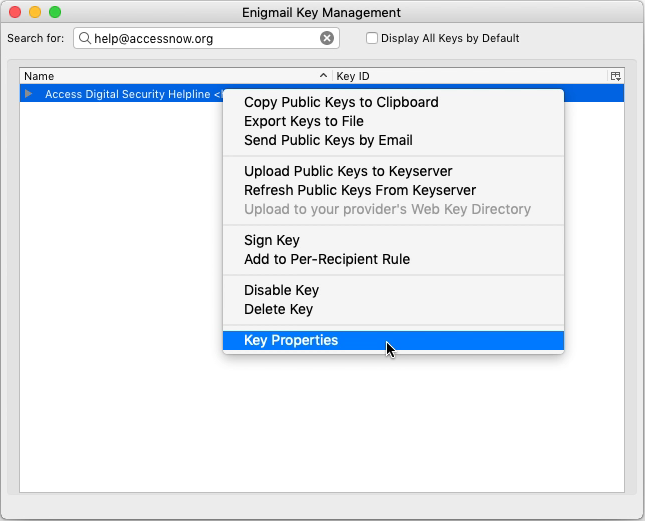
-
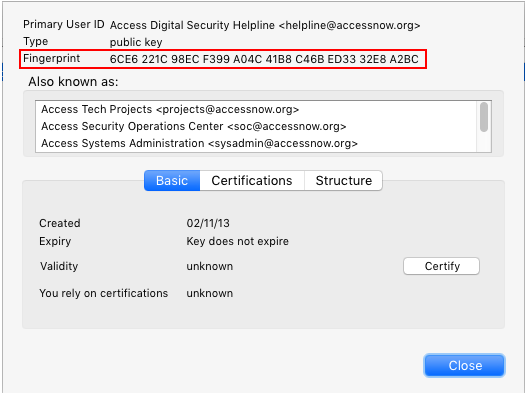
In the “Key Properties” window for the selected key, you will see the fingerprint of the key. Check that it matches with the key you obtained from your contact. If the fingerprints match, you can now be sure that your receiver will be able to decrypt your email and that nobody has tampered with their PGP key.
Write and Send an Encrypted Email
-
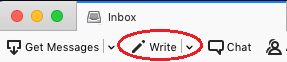
In Thunderbird, click the “Write” button in the top left corner.
-
Enter the email address of the person you want to write to in the “To:” field and make sure that both the lock and pencil icons are highlighted. This shows the email is going to be encrypted and signed. If the icons are not highlighted by default, make sure that you have imported your contact’s public PGP key and review Thunderbird’s security settings before continuing.
-
Write the “Subject” and your email message. Click “Send” when complete.
If subject line encryption is enabled in your Enigmail Settings, your subject line will be encrypted by default. If you have left that option unchecked, or have unchecked it to write to [email protected], you should be very careful not to write private information in the subject line under any circumstances.

-
After clicking Send, you must fill out your PGP passphrase for signing the message and click “OK”.
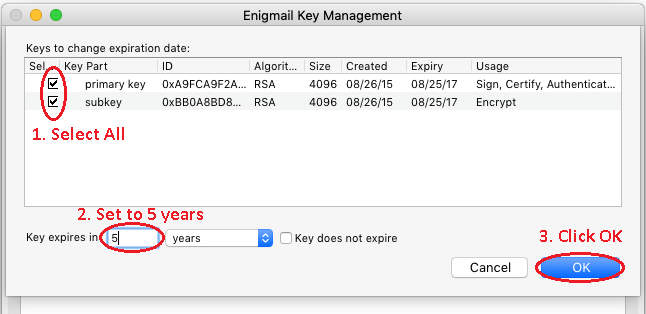
Extend Your Expired Key
If your key reaches its expiration date, you can always extend it as long as you still have access to the private key. To do so, you can follow these instructions:
-
Go to the Thunderbird menu bar, click “Enigmail”, then choose “Key Management”.
-
In the Key Management window, right-click the expired key and select “Change Expiration Date” in the drop-down menu.
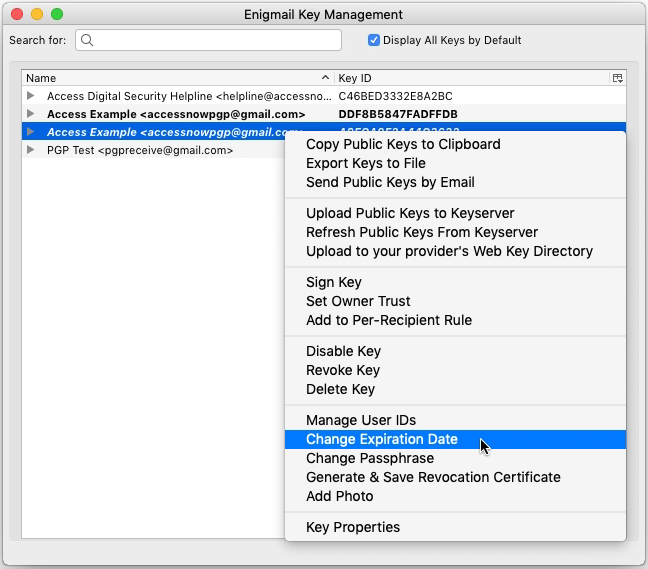
Note: An expired key can be easily identified in Enigmail, as its font format changes to italics.
-
Make sure that the primary and subkey are checked. Set the expiration date to 5 years at most and click “OK”.
-
Type in the passphrase for your PGP key and click “OK”.
-
Right-click the key you have just extended, and select “Upload Public Keys to Keyserver”.
Warning: This step is necessary to keep the public keyring details up-to-date in the publicly accessible keyservers. If you have chosen not to publish your PGP key, you should send the extended key to your contacts instead of spreading the updated key to the servers.
-
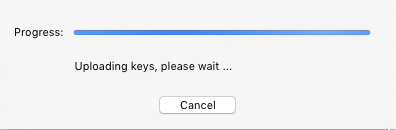
Wait for the key upload to finish.
Congratulations! You have everything correctly set up for encrypting your email!
This guide was brought to you by Access Now. If you have any questions or problems, please contact the Access Now Helpline. Our Tech team will be happy to help.

Share – Copy and redistribute the material in any medium or format.
Adapt – Remix, transform, and build upon the material.
Noncommercial – You may not use the material for commercial purposes.